I know, I know, the Hawthorn sewalong is not supposed to be over until the end of July, but, well, …….. let’s face it. This dress is gorgeous and I couldn’t wait any longer to wear it!

Front View

Back View
Colette Patterns has been on a back burner for me lately since Cake Patterns came onto the scene. I’ll be honest. Colette Patterns are gorgeous, but they are a lot of work. All those intricate touches they include (read: a lot of hand sewing) really make the garments special, but I am in a transition phase in my life (I recently lost 20 pounds and am trying to lose 20 more) and am not sure I want to devote all the time to sew a garment that in a few months will be too big for me. I already have two absolutely gorgeous Meringue skirts that are falling off of my hips. This is one of the reasons I have been sewing a lot more with knits recently. They are a bit more forgiving when it comes to sizing and fit and I am getting more wear out of them. Colette Patterns are structured and fitted and a slight change in body shape can make or break whether the garment is still flattering.
But, all of this went out the window when they released the Hawthorn Shirtdress pattern.
I have really been jonesing to make a shirt dress, but I am quite curvy and most of the patterns out there are ill suited for curves. Not this one! It has a nice structured bodice attached to a half circle skirt – a flattering combination for a womanly figure.
My intention was to follow along with the sewalong. I ordered my fabric, prewashed and ironed it, and then set about making a muslin (or toile, depending on where in the world you are). I gave myself plenty of time to make a muslin since I experienced a ridiculous amount of fitting issues with the Jasmine Blouse. I knew I would need to make several changes to the pattern for my narrow, forward shoulders as well as account for my height (5’1″) and grade between several sizes of the pattern. Here’s a list of the changes I made to the pattern before cutting any fabric:
- Started with a size 12 bodice, based on my full bust measurement
- Narrowed the shoulder 1/2″ using the tutorial. This was the first time I actually did this adjustment properly and BOY did it make a difference. In the past I “just winged it” with success, but a WHOLE lot more work.
- Adjusted the shoulder seam forward 1/2″ on the front bodice, back bodice, collar front, collar back, facing back, and facing front (I know this sounds like a lot of work, but it wasn’t. For the front pieces all I did was mark ½” lower on the outer shoulder and draw a diagonal line from the outer to the inner shoulder line. For the back pieces, I did the opposite and marked a ½” higher and drew the diagonal line).
- Shortened the bodice length 1″ on the front and back bodice pieces
- Removed a 1″ wedge from the back bodice piece for a swayback adjustment
- I knew a size 12 bodice would be too small for me in the abdomen area, so I graded from a size 12 to a size 18 on the side seams starting at the notch all the way to the end of the bodice. I also used the size 18 waist darts on the front and back bodice pieces.
After all of these pattern changes I cut into my muslin fabric. I even did the facings, with interfacing! I wanted to make sure I knew EXACTLY what all of the changes I made looked like so I could tweak accordingly. Imagine my surprise when I tried on the bodice muslin and looked in the mirror and everything looked pretty good. I stood there for a full 5 minutes and then said “Humpf!” I was fully expecting MASSIVE amounts of tweaking a la Jasmine Blouse.
But, nope.
The changes I made were pretty good. Maybe I am learning after all about my body and pattern alterations. Maybe I got lucky.
Nah, let’s go with the first :-).
I didn’t take a pic (sorry!) and I had to take the muslin apart to transfer some additional alterations (see below), so I can’t get one now. I will try to include muslin pics in the future. I know I like it when others include muslin photos.
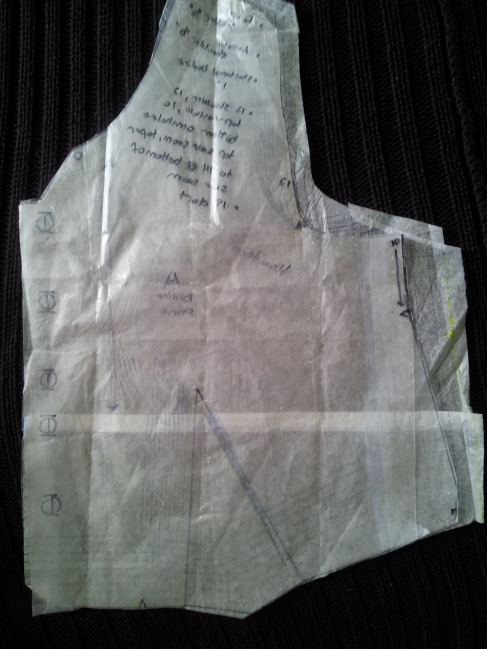
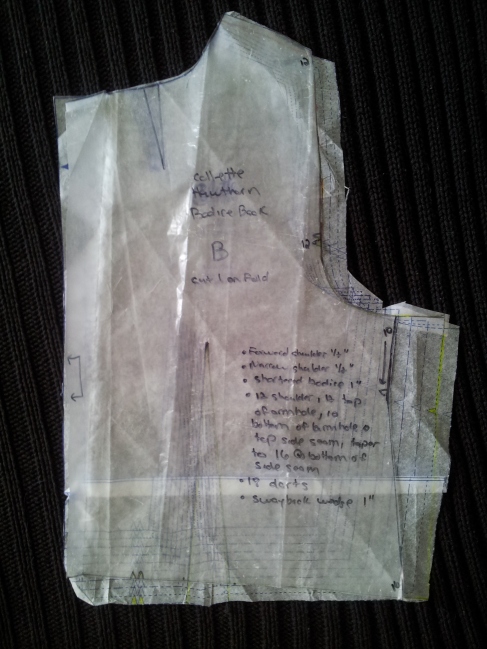
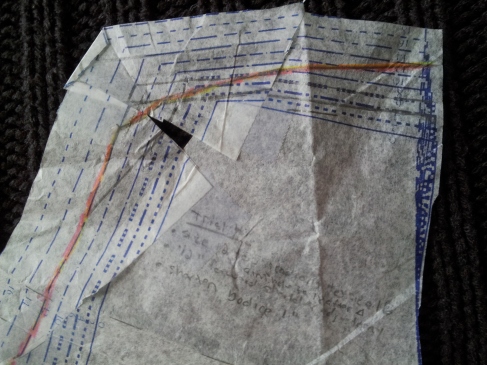
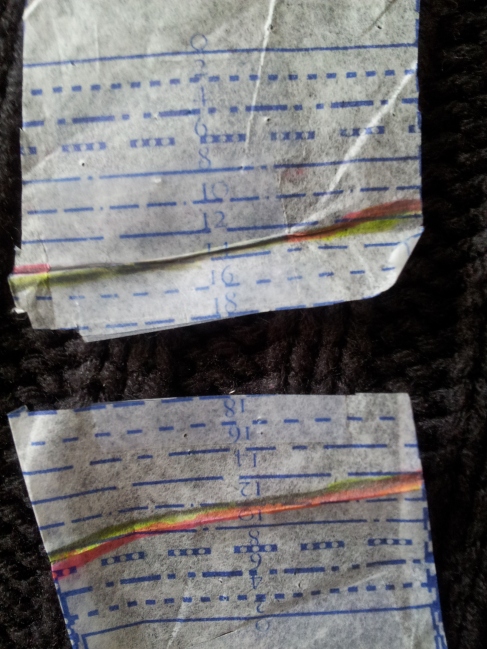
The side seams were too big so I brought them in until the fit was perfect and marked my pattern pieces. It ends up I needed to grade to a 16, not an 18, and I used the underarm seam at a size 10 instead of the 12. I kept the size 18 darts since everything fit well after taking in the side seams only. Since the bottom of the bodice ended up being a size 16 I used the size 16 for the skirt pieces. Here’s my final pattern pieces for those of you who just read a jumble of words and have no idea what any of them mean 🙂 :
Front bodice pattern piece overlaid with my modified pattern
Back bodice pattern piece overlaid with my modified pattern
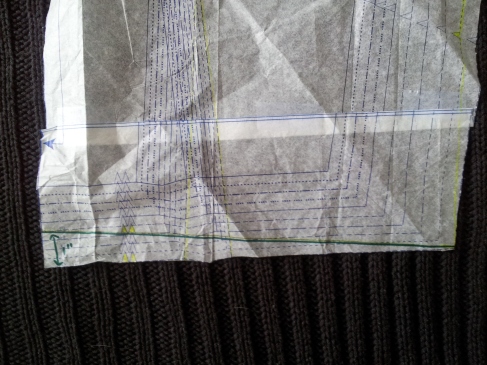
Back bodice pattern piece with 1” wedge removed for swayback adjustment
Close up of narrow shoulder + forward shoulder adjustment on front bodice pattern piece
Close up of forward shoulder adjustment of front and back facings
Once again, here’s the finished dress:

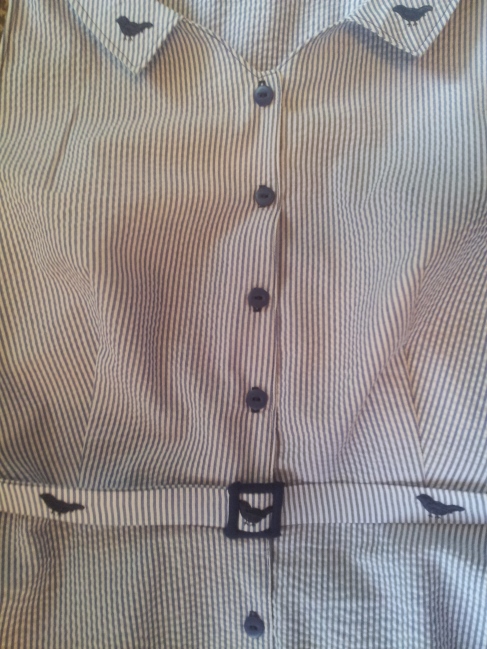
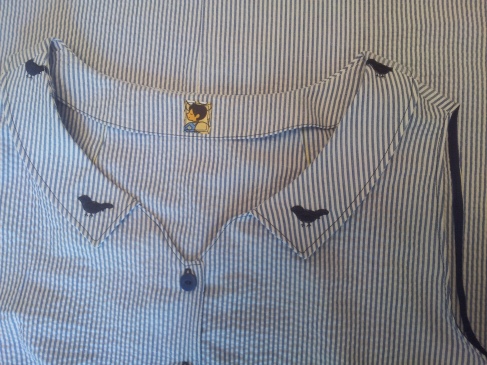
Isn’t she pretty? I used a navy and white stripe seersucker fabric I got from Fabric.com and the coordinating fabric that has embroidered birds in navy for the collar and belt. I had a lot of fun playing around with birdie placement on the collar and belt.
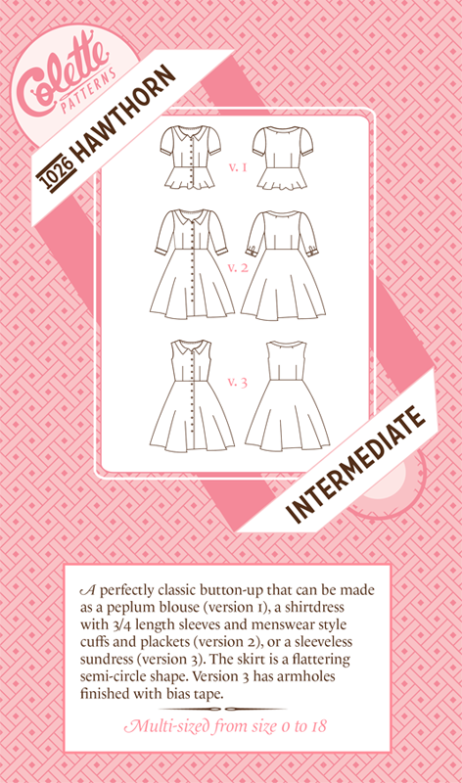
I went with the sleeveless version (version 3) since I was making it out of seersucker. I thought it would make a great summer dress. I was also not quite ready to tackle the longer sleeves (but I will, I WILL – for a fall version). I used cute little navy buttons, navy thread for the top-stitching, and navy bias tape for the bound armholes.
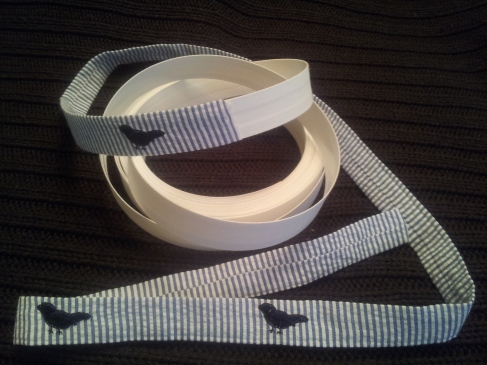
I decided to make a belt since I wasn’t sure, even though the pattern said it was for more curvy girls, if I would get enough definition at my waist. I think the dress is flattering without the belt, but the belt is also a little more fun, dontcha think? I used this tutorial to make a fabric covered belt and to make sure the belt stays where it is supposed to be I made two thread belt loops and attached them to the side seams.
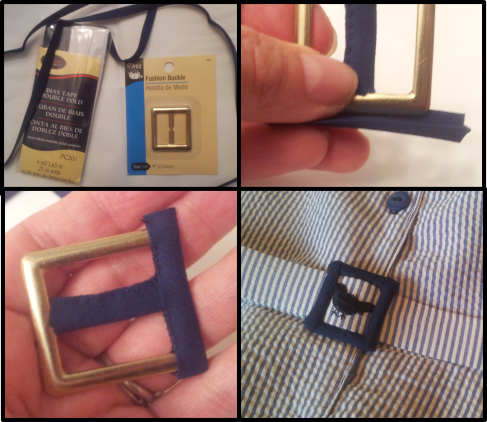
I also covered a 1″ metal belt buckle with the same navy bias tape used to bind the armholes to coordinate better with the dress. I used a needle and thread to sew the bias tape around the buckle, making sure all of the raw edges were tucked in or folded over. Some type of fabric glue and/or fray check is probably easier if anyone else wants to do this, but I couldn’t find mine (read: too lazy to go look for it), and the needle and thread were just staring at me.
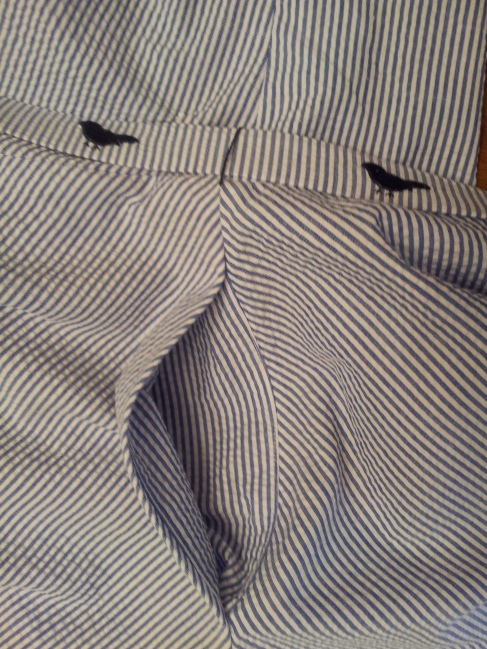
Oh, and I added side seam pockets because pockets are a necessity for me.
I have also starting tagging my garments with this cute Kawaii fabric. So adorable and it makes me do a little jig every time I see it.
I ended up not having to hem the skirt at all, which is quite a surprise since I am on the short side. Although, Ido tend to like my skirts to hit just below the knee instead of above. I used fusible webbing to stabilize the hem and turned it up 1/2″, then 1″, then topstitched in the navy thread for added detail.
And the last thing I did worth mentioning is I didn’t actually cut into the last 7 buttonholes on the skirt. I overlapped the skirt edges and then sewed the button directly onto the button hole and through both pieces of skirt to secure everything together. I didn’t figure I was ever going to unbutton those buttons and I preferred not having to worry about those little threads poking out of the buttonholes.
Things I like about this pattern:
- It was surprisingly easy and quick to sew. I thought it would be more difficult or fiddly, or time consuming. Nope. It took me probably 2.5 hours to completely assemble the bodice (minus buttons and button holes). This is my excuse as to why I did not wait for the sewalong and I am sticking to it.
- The collar is so dainty. It makes me feel so pretty 🙂
- I love how with different sleeve variations and fabric choices you can make a Hawthorn for different seasons. This is my summer one, but I am planning on making a flannelette version with the longer sleeves (version 2) for the fall and winter.
- Version 3 has bias tape bound armholes. Such a nice and classy and polished way to finish armholes. And, if you want, you can add a pop of color there for visual interest.
- The impeccably written instructions. As always, Colette Patterns give quite concise and easy to follow directions.
Things I am not sure about with this pattern:
- The collar is made up of 3 pieces on the top and 3 pieces on the bottom and it attached with a facing. It seems like somehow, somewhere some of these pieces could have been consolidated. It makes for sewing the collar pieces together a little challenging, as it gets rather thick at the seams. I tried taping the collar front and back pieces together to see if I could cut them out as one piece on top and one piece on bottom, but then the grain lines didn’t line up (or the stripes) and I wasn’t sure how much that would affect how the collar sat. For the next one I may see if there is a way to replace the facing with bias tape, but I will need to looks closely at how the back facing and front facing connect, since you need the front facing for the buttonhole/button placket. Something to ponder.
- Why 13 buttons??? Buttons are sold in even numbers most of the time. I know this is nit-picky. But, I had to buy a third card of buttons for the last button. Perhaps I could have skipped it and only put 12 on the dress, but I was trying to follow the directions.
- The directions tell you to press the darts flat, but that kind of defeats the purpose of making them. So, please, please, when pressing your darts, use a ham so you maintain the 3-dimensional shaping that the dart is there to achieve.
- I don’t the pattern is an intermediate skill level (except perhaps the longer sleeves). I think a beginner sewist could totally tackle this dress with ease. And, I am pretty sure the sewalong will cover the longer sleeve version so I am guessing a beginner can probably do version 2 as well.

So, how many of you out there know of alterations that you need to do on patterns before you even get started? And, when you do them, do they work out as planned? I’ll admit I was shocked that all my pre-cutting alterations worked out so beautifully, even though they were “supposed to.” I am curious if this is normal or abnormal. Please share with me what alterations you always seem to do, how you figured out you needed to do them routinely, and if they solve your fitting dilemmas. We can all benefit from a collaborative fitting discussion, eh?
That’s all folks!
Happy Sewing!


OMG Melanie…. your Hawthorn looks great on you! and yes I agree tweeking the patterns ahead it pays in the long run. Me too….I am a sucker for seersucker LOL
Thank you, thank you (doing a curtsey in my new dress, of course). I have been wanting to make something out of seersucker for forever now, and was even eyeing this fabric. But, I didn’t have a specific project in mind. Until the Hawthorn was released, that is.
You’re version is absolutely lovely! I’m also going to be making version 3 in seersucker as well (black and white.) I’m pretty wide in the hips, and have been considering pockets, do you feel the pockets you added create any extra visual width at the hip area? I had that problem with the Peony, so I’m a little on the fence!
Maybe it adds a teeny bit of bulk, but I don’t notice it, nor do I think you can see it. Go for it! I wore this dress all day today and was quite grateful I had the pockets.
Beautiful dress Melanie, love how you got the birdies in exactly the right places! Very pretty, and a perfect fit once again.
I also have to make things wider round the mid section, and have a short waist so there’s usually a bit of tweaking of bodice length too. I’ve only sewn one Colette pattern so far (jasmine) but I liked it a lot.
All the tweaking you did to the pattern was so worth it. The fit on your dress is so so good. Gorgeous!
Thanks Melizza! I stumbled upon your blog while making the Jasmine. It’s neat to see you’ve stumbled upon mine.
I’m in love with the hawthorne pattern and I think you’ve just convinced me that this pattern is a must! I love the chick details on the collar! the are very cute. I also can’t quite believe that anyone would need 6 pieces to make a collar! I can defs see the appeal of cake when faced with that!
I absolutely LOVED that fabric with the birds, but I knew I couldn’t make the entire dress out of it and wear it regularly. So, I did the next best thing. As for the collar, I am brainstorming ways to consolidate pieces to make the collar construction simpler. We’ll see if I succeed.
Beautiful dress, I adore the little bird details and your matching belt.
You did an excellent job, on both the dress and the belt!
Your Hawthorn is beautiful. I love the little birds!
How did I miss this fabulous Hawthorn on my first read through your blog? I love the bird belt, it’s all kinds of adorable.
Pingback: Fall For Cotton Vintage Sew-Along Mood Boards | TheSeedsof3
Pingback: It’s A Christmas Gift Post, Fa La La La Laaaaaaaaaa! | TheSeedsof3
Pingback: Top 5 of 2013: Part III: Hits and Misses | TheSeedsof3
Holy crap, I love this so much! Everything about it, the fabric, the fit, the cut, the everything. Hope mine turns out as nicely!