Guess what Y’all?
I made my first coat!
Isn’t she pretty?
This is Lena Merrin‘s Jackie Coat

(Click for source)
And I love her!

Supply Stats:
- 3 yards of wool blend jacket fabric from Fabric.com (no longer available)
- 1 yard of cotton silk blend lining for shell (more info below)
- 1 yard black Ambiance lining for sleeves purchased locally at Jo-Ann’s
- 5 purple coconut shell button and 5 small red buttons purchased locally at Jo-Ann’s
Pattern Stats:
- Cut a straight size 14 (yay for simple!)
- Shortened the coat 1.5″ since I am only 5’1″ and then I could squeeze the shell and pockets out of 1 yd of my slightly pricey cotton silk blend lining fabric
I first caught glimpse of this beautiful coat over on SewHopeful’s Blog. She raved about the style, the drafting, the instructions, everything!
I took a bit of a technique plunge with this pattern as I had never done welt pockets, bound buttonholes, or bagged a lining before.
I feel pretty accomplished now with all of the new sewing skills I picked up with this project.

As a novice at welt pockets, bound buttonholes, and lining bagging I was very pleased that Lena provided extra photo tutorials for these skills on her website. Her bound buttonhole method is pinned as being “the easiest bound buttonholes you’ve ever seen” and I tend to agree. I practiced it before cutting into my coat and I got a perfect and beautiful bound buttonhole on the first try.

For comparison, I also tried the method on the Coletterie and found that I much preferred the simpler method and the look of the finished result of Lena’s method.

(Coletterie method on left, Merrin method on right)
Her Jacket Bagging: That Tricky Corner tutorial was unbelievably clean and easy, but provided a crisp professional finish with absolutely no hand sewing!

If you are oohing and aahing about my lining, it is from Spoonflower. I got the cotton silk blend. It had vibrant colors and was a dream to sew with, very nice! The only issue is it comes in a 40″ width.
The photo tutorial provided for the welt pocket construction was a little confusing for a newbie like me, but only because the fabrics in the photos don’t have an obvious right and wrong sides, so I didn’t know which way to put things. A quick flurry of tweets to Lena with a few attached pics cleared things right up, but if you’re curious I’ve included here the information I would have liked to have seen in the tutorial:

(Left: extra lines to draw in the welt go closer to the coat opening; Right: welt is attached to the pocket bag lining on the right side)
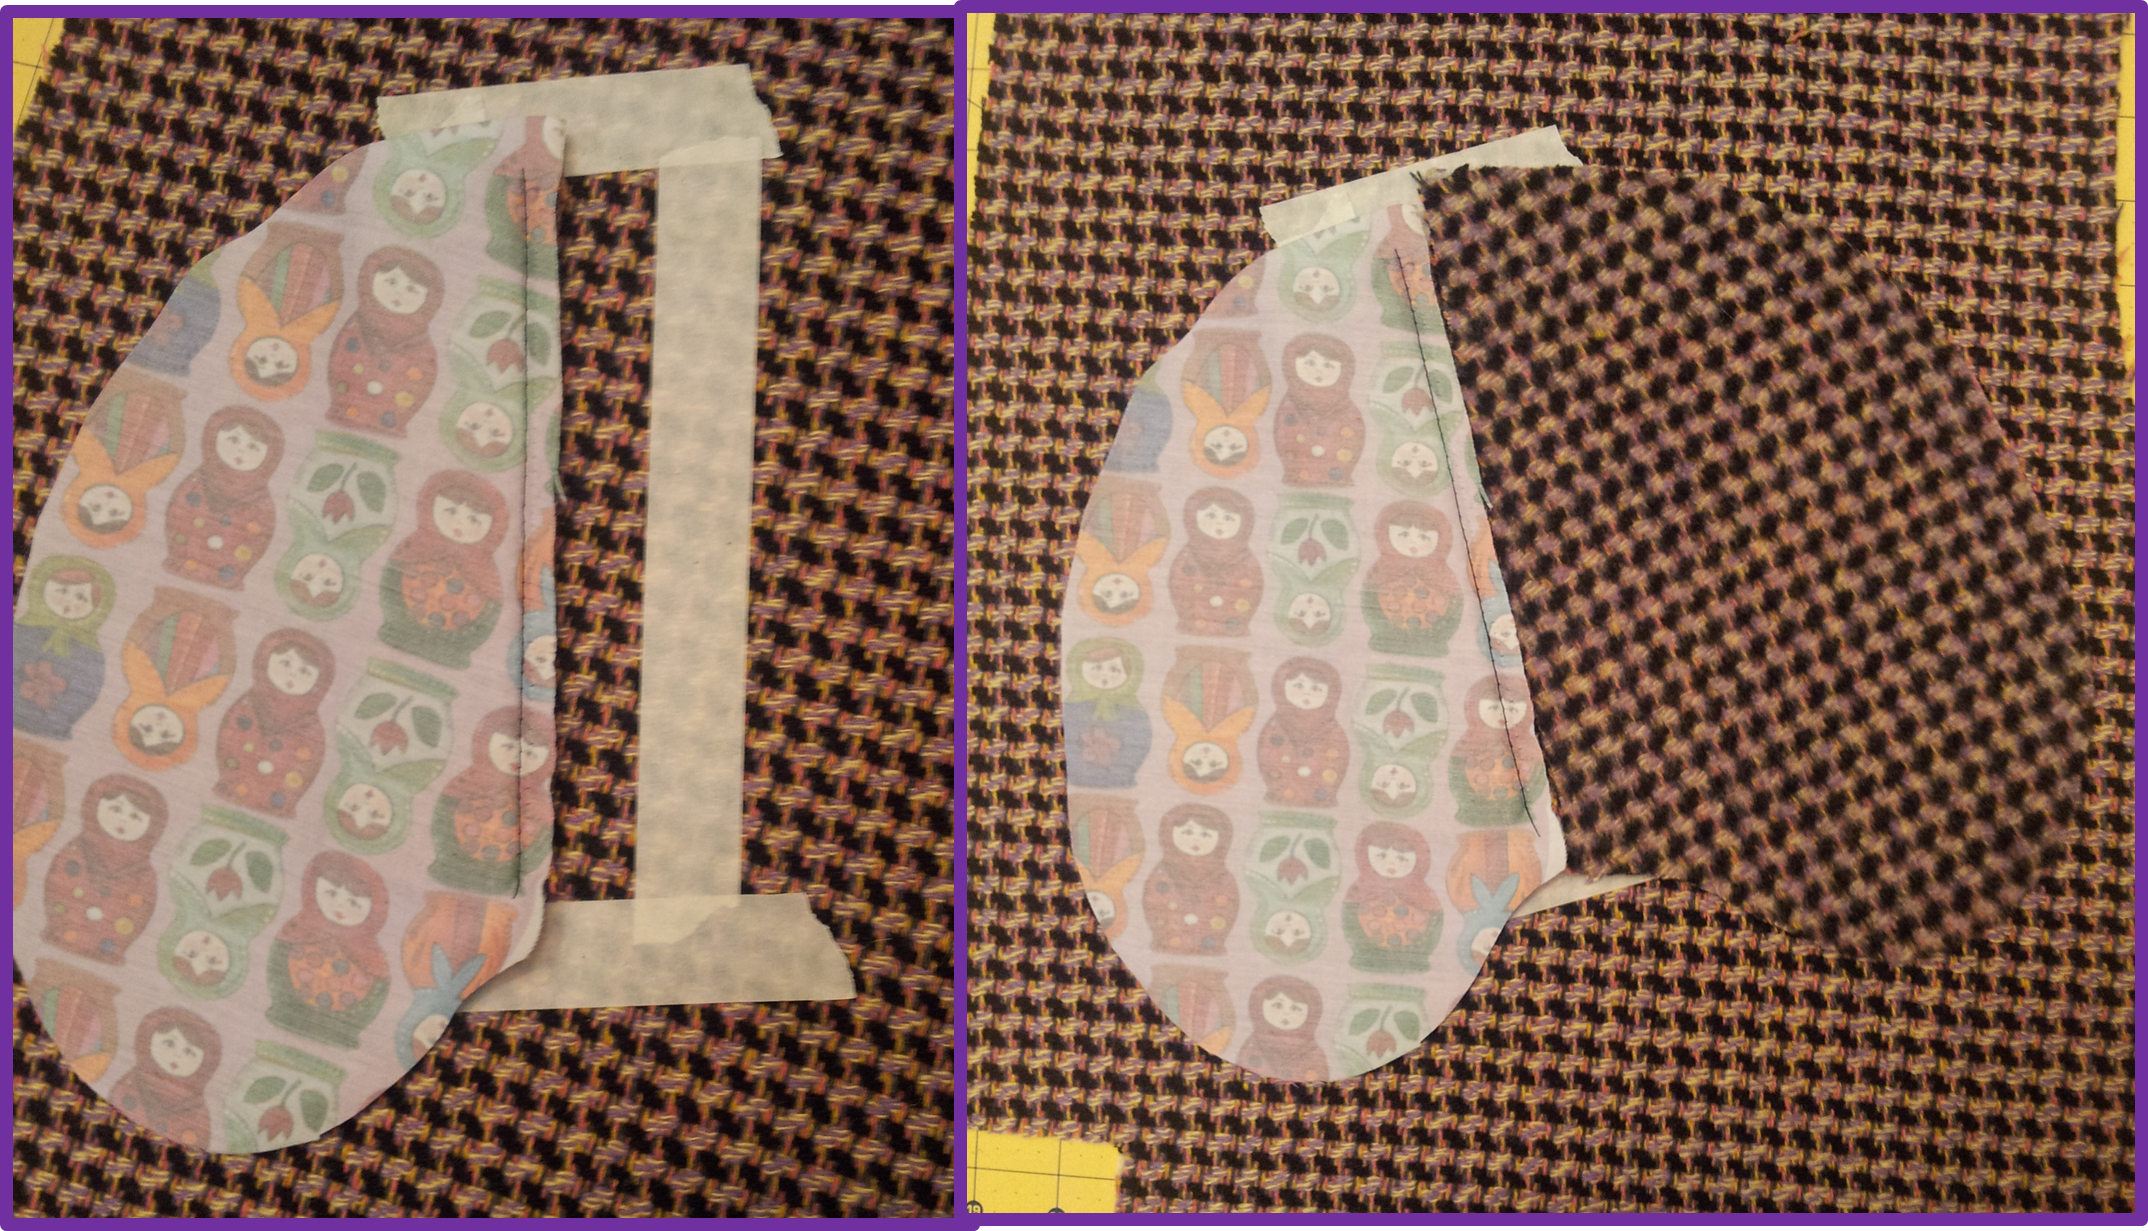
(Left: lay welt side down on front of the right side of the coat in middle of welt rectangle; Right: lay fabric pocket bag right side down in middle if welt rectangle right next to the welt and pocket bag lining)
Here’s more photos of me wearing the coat:

Front View, Unbuttoned

Front View, Buttoned

Back View

Side View

Sleeve uncuffed versus cuffed. You can’t tell in this photo, but if my arm is down the sleeve reaches to my wrist, so technically I could wear the coat with full length sleeves. But, bear in mind, I am short (5’1″) so you may not be able to do this.
My original inclination was to cut a size 14 and grade to a size 16 in the hips, but after conferring with Lena she thought there should be enough ease in the coat without grading, so I didn’t and cut a straight 14. In retrospect, maybe I should have graded, a little. When the coat is buttoned it doesn’t fall straight from my shoulders to my hips like a proper swing coat should, but instead curves in a little around the small of my back. Not a deal breaker, for sure, but if I ever want to make this coat again (which I WILL when I need another coat) I would grade the hips up a size.
Just in case you haven’t seen enough photos, here’s a few more:

Outer and inner buttons

Sleeve Lining

Inside the pocket (hello there little Russian doll looking back at me 🙂 )

Progress shot of inside the coat before sewing up seams and attaching the lining.
And if you have made it this far through this post I will treat you with the only photo of the inside of the jacket while I am wearing it, also know as the most hilarious picture of me
EVER
TAKEN

Happy Sewing!


I really enjoyed seeing your progress photos on Instagram. Well done! Your coat looks super cute. Great details as well.
thanks!
Wow… Fantastic! You look FAB! ~Laurie
awh, shucks! 🙂
It looks brilliant – and thank you for all the info on bound buttonholes!
I love when people post technique info, so I thought I would share a little of my journey.
Your coat turned out so awesome!!
thanks Leila, she is sooooooooo comfy and chic, all at the same time.
Amazing! This turned out so, so good, and you got to learn so many new techniques. Thanks especially for posting the pocket welt details. I’ll refer back to this post once I start my coat. Yes, I bought the pattern after sewing your in-progress shots! (Even though I’m thousands of miles away from my sewing machine…) 🙂
I love your nesting doll lining! The coat looks spectacular! Really nicely done!
I died when I saw that fabric!
Aw Melanie! That is gorgeous! It really suits you too. Nice work 😉
Thanks Fiona, I love it. It is so comfy. Now, if it would only get cold here I could wear it 🙂
I love it. Amazing and your welt pockets and bound buttonholes look fantastic (your buttonholes are way nicer than mine, I was so worried about fraying I made them a bit chunky plus they are a tad uneven). Plus how amazing is the bagged lining? Such a beautiful finish. I just realized on reading your post that I did grade up a size in the hips. I really wanted the swingy look and my measurements are a size or two more in the hips. But your jacket still looks great and I bet it is soooo comfy to wear. Congratulations on your first jacket. It is a huge achievement and you have done a beautiful job.
It was everything you said it would be, it is fantastic! So professional inside and out. No one will believe I made it. I should make a tag showing it was handmade by me. Thanks for doing such a wonderful job on yours. It was my inspiration!
Love it – really elegant! Those buttonholes are perfect! Need to check out lena’s method
do it, do it now!! Or at least before your next bound button hole project. Easy, clean and perfect for my first try on a bound buttonhole ever.
You did an absolutely beautiful job! The style looks great on you and I love the lining! Surprise fun linings are the best. =)
lol – the last photo! This is definitely a coat to wear until it completely falls apart! Love it!
I laughed so hard when I saw the last pic my hubby took. My first though was there is no WAY I am putting it on the blog. Then I thought there is no way I could NOT put it on the blog. I still laugh every time I see it.
That’s exactly why I post my “outtakes” photos – they are so bad, they HAVE to be seen! Husbands are good at taking random photos, especially when you are “between” posing and don’t know they are still shooting. =)
You did a great job, excellent even! I know how hard it is to sew things that involve many new techniques, but you have aced them all 🙂
thanks for making such a great pattern and thanks so much for all of your help along the way!
Great job on the coat! The lining fabric is fun! I’m sure you’ll get a lot of use from that coat. Love the last pic!
now I need opera length gloves and a hat 😉
Amazing! This turned out so, so good, and you got to learn so many new techniques. Thanks especially for posting the pocket welt details. I’ll refer back to this post once I start my coat. Yes, I bought the pattern after sewing your in-progress shots! (Even though I’m thousands of miles away from my sewing machine…)
you will love it! Feel free to ask me any questions, but ask Lena too, she is very available and willing to help.
Pingback: Melanie’s Jackie
Pingback: Cutting, cutting and more cutting… | Pelly Melly Patterns
Pingback: Oh Jackie… | Pelly Melly Patterns
Pingback: Mardi Gras Extravaganza (and a GIVEAWAY!!!!) | TheSeedsof3